WC0M Home
Amateur Radio Station
WC0M
(Formerly: WC0EM, WF0GM)
My Tower Installation
(Page 2 of 4)
Now that I knew my chosen location
was away from the buried cable, I marked the spot on my site plan, took the
tower plans I had obtained from GME and submitted them to the county. It was
looked over and accepted within 3 days. So on May 1, 2007, I paid the $70 fee and
picked up my permit. I was finally in business!
On May 3, I ordered the tower
along with a Yaesu thrust bearing and a messenger line kit. The messenger line
is a stainless steel cable that attaches to the Hazer and the base of the tower.
It is used to tie down the feed line and rotor control cable. This keeps
them from blowing around in the wind, and helps support the weight of the
cables.
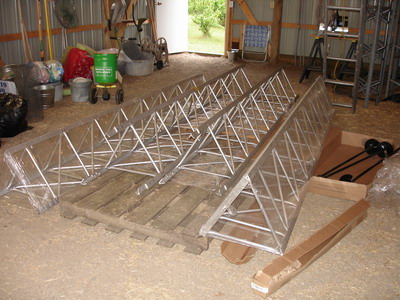
On Friday, May 18, the tower showed up to my QTH via Con-way Freight. The truck
driver backed up to my pole building and was nice enough to help me unload
everything. My tower was the only thing on the truck, packed in a crate that was
3' 8" H x 4' W x 10' 6" L. The tower was delivered as 5 separate ten foot
sections.
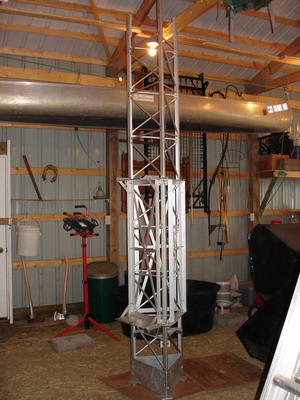
The Hazer arrived assembled and mounted on the bottom section.
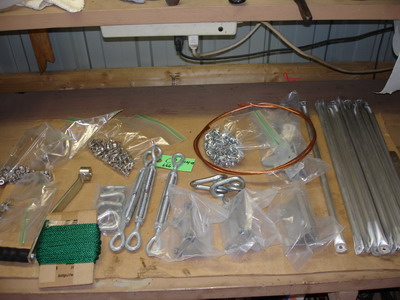
The miscellaneous hardware.
An 8 foot ground rod came in its own box, the base parts in its own box, and the
4 foot screw-in guy anchors, stainless steel guy cable, guy brackets,
turnbuckles and the rest of the hardware came in the last box.
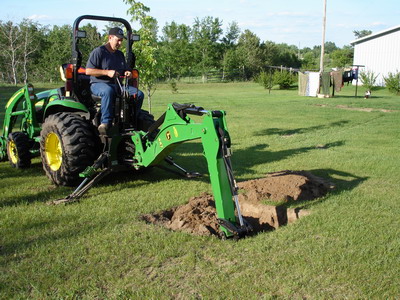
Yes, you guessed it, I called my electrician, and on June 4, 2007 he dug the
hole and moved the dirt to a location on the other side of my fence line where I
was having a little bit of an erosion problem anyway. A hole that is 4' W x 4'
L x 5' deep makes a very large pile of dirt. I can almost feel the avoided back
pain! That was the best $125 I have ever spent!
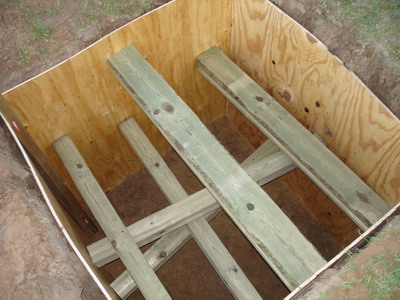
We had very hot and dry weather and I was fearful that the sandy soil would dry
out and cave in on the sides. So after the hole was dug, I cut two sheets of
plywood in half. I then used the four pieces to support the four walls of the
hole by jamming some 4x4's horizontally between opposing sides. I then covered the
hole with a tarp. Each morning and evening I sprayed a light mist of water on the
walls of the hole to keep it moist, and hopefully prevent a cave in. Fortunately
I was very successful in this regard. A cave-in did not occur!
Now because I was
inexperienced with building a tower, and because GME had provided me with
inaccurate information regarding the tower base section, I encountered a little
frustration trying to figure things out with regard to the foundation. A few days after the tower
arrived, I finally had the chance to open up the box containing the base parts. Inside I found parts
that did not match the drawing of the hinged base I had received from GME's web
site prior
to purchase. The drawing I had originally received showed cross bracing and
angle iron bolted together along with the 7/8-9 anchor bolts. So my impression
was that the parts that get buried in the concrete would not require any rebar,
and indeed I was told by one of the engineers that I would not need any rebar.
But what I really received were just three 7/8-9 x 30 inch long galvanized rods, six
steel cross straps (three for each end to form a triangle) and fifteen 7/8-9
galvanized nuts. I also noticed at this time that I would need 3 more nuts so
that I could level the hinged base once it was embedded in the concrete. I was
not comfortable with the idea of not using rebar to reinforce the base. The base assembly did not
give me the feeling that it would be sturdy enough. I was not very happy at all with GME on this account.
Also, it was at this point
that I realized the Hazer is electrically isolated from the rest of the tower.
It rides up and down the length of the legs on Delrin bearing blocks. Therefore
the antenna and mast would not be grounded. So I needed to install a lightning
rod on the highest point of the mast, attach a copper ground wire to it, and run
it all the way down to a ground rod near the base of the tower. On June 8, I
ordered three extra nuts for the base plate, and also the lightning rod kit. In
hind site, I should have made my own lightning rod. The kit I bought from GME
cost me $110 and all that was in the kit was a 1/2" piece of aluminum rod 18"
long, filed to a point on one end, with a U-bold clamp on the other end, and an
8 foot ground rod. It did not come with the 60 feet of copper ground wire I
would need. GME wanted $3 a foot for #6 twisted strand copper ground wire, so I
decided to purchase it somewhere else. A friend of mine told me about a place in
St. Paul, MN (Thompson Lightning Protection) that sells tower ground wire. I
don't believe one should take grounding lightly. I
bought 150 feet of 29 x 17 gauge (twice the size that Glen Martin offered)
braided copper wire for half the price per foot. This gave me plenty
of extra wire to use for grounding each leg of the tower, with some left over
for station grounding as well. And I also bought a ground rod for the third leg
of the tower from my
neighborhood home improvement store for $12.
Continued on Page 3

Back
to Page 1

Back to Station Photos page

WC0M Home