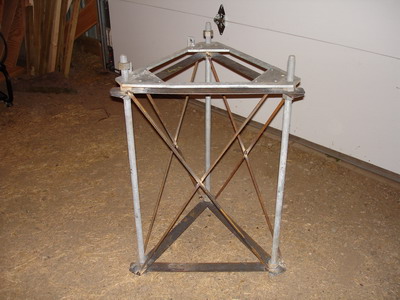
First of all, I welded an "X" shape of rebar vertically on all three sides of the base. Then I welded together a nice rebar cage that would encircle the base inside the 5 foot deep hole.
Amateur Radio Station
WC0M
(Formerly: WC0EM, WF0GM)
My Tower Installation
(Page 3 of 4)
Luckily, my father-in-law had just given me a very nice gift. A brand new welder! So now I had something to strengthen the tower foundation with.
First of all, I welded an "X" shape of rebar vertically on all
three sides of the base. Then I welded together a nice rebar cage that would
encircle the base inside the 5 foot deep hole.
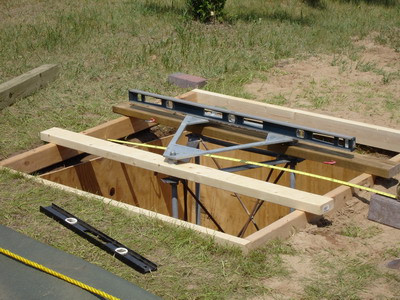
Now I had to figure out how
to suspend the anchor bolts inside the hole just deep enough so that the anchor
bolts still protruded 3 inches above the finished concrete. I took a day off of
work; Wed, June 13th. This gave me the opportunity I needed to build a box around the top
edge of the hole. After getting the outer box level, I cut two pieces of 2x4 to span
the distance across the top of the box. I drilled two holes in one board and a
single hole in the other board to fasten the base bolts to.
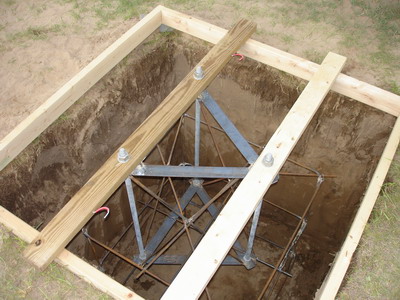
Then I put the rebar cage inside the hole, and hung the base
bolts inside the rebar cage using my 2x4 hangers.
This worked out very well.
At this point I could go no further until an inspector approved the foundation prior to pouring the concrete. I called the county and the very next day the inspector looked at the work I had done. I was happy to see that he signed off on the permit with his approval. On Friday I called a local concrete vendor and ordered 3 cubic yards of 4000 psi, 28 days-to-cure concrete to be delivered the next morning, Saturday June 16, 2007.
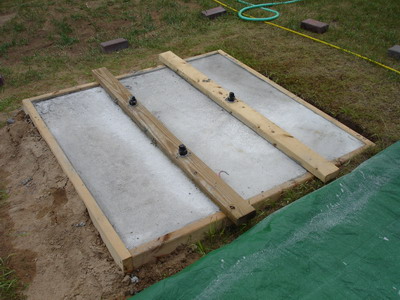
Saturday morning the concrete truck showed up when expected. It was a nice clear
day; a good one for pouring concrete. It was very easy to put the truck into
position since there was plenty of room for the driver to maneuver the truck up
to the hole. We decided to pour the concrete into the back of the hole and work
our way forward. If I had to do it all over again, I would have instead poured
the concrete into the center of the hole between the base bolts first, then the
sides. What had happened was the weight of the concrete tipped the angle of the
base bolts a little off of vertical, and so by the time we poured the concrete in
the middle of the base, the angle could not be corrected. Well, fortunately this
was not a show stopper. Later I was able to level out the base plate
using the three extra leveling nuts I had ordered just in
case this type of thing should happen.
Now I had 28 days to get the tower assembled and everything in order before the concrete would be fully cured. I started recruiting ham buddies on the local repeater and a couple weeks later I sent out an invitation via email to several good folks. Attached was an invitation for the tower raising party. I offered cold drinks a free lunch to follow. (Hoping that would entice more people to come on out and help with the project!)
I was told that you don't want the concrete to dry too quickly. So every day, morning and evening, I sprayed water onto the surface of the concrete and kept a tarp over it to help the concrete cure nicely. This went well. And every evening I spent some time to get the tower sections ready for assembly. I grabbed a wrench to check the 1/4-20 carriage bolts that held the bracing and sections together. To my dismay, I found a few that were a little loose. Therefore I decided to go through every single bolt on the tower to ensure that all were fastened tightly. I did not want to have to deal with loose bolts after the tower was erected! Now this was a lot of work. You see, there are 120 bolts per section on that tower. That means that I had to tighten by hand 600 bolts! I found many bolts that should have been fastened tighter. And a socket wrench did not fit due to the angle of the tower legs, so I had to use an open end wrench.
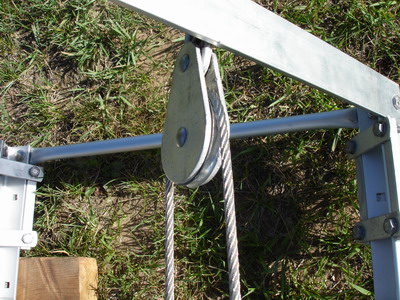
The Pulley at the Top.
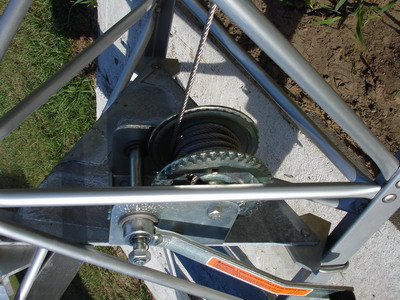
The Winch at the Bottom
On the top section of the
tower is an aluminum pulley that supports the entire weight of the Hazer. This
is the pulley that the stainless steel cable rides on. The cable is
attached to a winch at the base of the tower. The pulley was cut pretty rough. I took a rat
tail file to smooth out the cable cradle on the pulley wheel. Next I decided to
slide the Hazer onto the top section to see how things fit. Well I'm glad I did
because the top braces on the top section prevented the Hazer from going all the
way to the top of the tower. This was because of the angle they were bolted on
at. You see, the horizontal braces are spaced 15 inches apart as they make there
way up the tower.
The Hazer has a spring-loaded safety latch that rests on top
of each horizontal brace as it travels up the tower. If that latch does not make
it over the highest horizontal brace it rests on, then you lose 15 inches of
vertical height. So I moved the very top braces up just about an inch, so that I
could gain the next whole brace spacing. Here you can see the latch resting on a
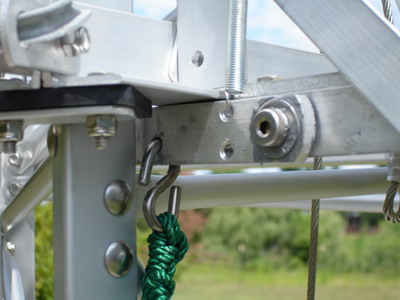
section brace. A green rope is tied to the S-hook that releases the latch.
Speaking of the safety latch, the S-hook seemed wimpy to me so I replaced it
with a larger stronger, stainless steel S-hook. Also the cord they provided was
not made out of Kevlar as they had advertised on their web site. I purchased a
good solid length of rope to replace the rather thin cord that came with the
tower package. The Hazer cannot be lowered without releasing the safety latch!
Another modification I had to
make was increase the size of the holes on the thrust bearing plate. In all
fairness, this is something that they told me about in advance of the tower
purchase,
so I knew I would have to do it. I simply had to elongate the holes using a
rat tail file. This was necessary to get the holes to match the bolt pattern on the thrust
bearing. This job took me about a half an hour, so not too bad. But still, this
is something that they should have been able to correct on their print for this
part very easily.
The thrust bearing and the mast mounted on the Hazer.
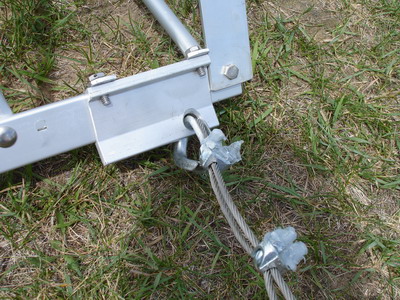
Guy Bracket/Clamp with guy wire attached prior to raising.
I was also disappointed with
the guy brackets.
I look back now, and I should have drilled a hole through each
one into the tower leg. Then I could run a bolt through the bracket and into the tower leg
in addition to just relying upon the clamp straps. It was difficult to know how
far I could safely tighten the clamps without stripping the threads.
Nevertheless, I used what I considered to be quite an amount of force to secure
them. Later I had found that one of the clamps actually slid down a couple of
inches as the tower was raised, requiring a climb to correct the problem. This
clamp slid down just enough to prevent the Hazer's safety latch from resting on
the highest horizontal brace it could rest on.
The instructions called for
the guy anchors to be installed at the same angle as the guy cable coming from the top of
the tower. I used a CAD program to help me figure out the angle (58 degrees) I would need to
screw them in at. I then printed the angle onto a piece of paper that I taped to
a level. This gave me a guide to use while screwing in the anchors.
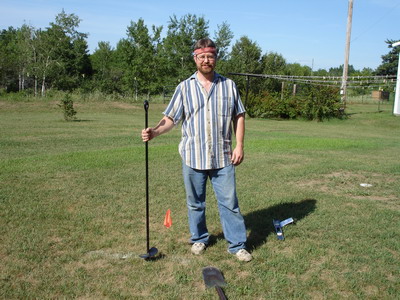
Four-foot screw-in anchors.
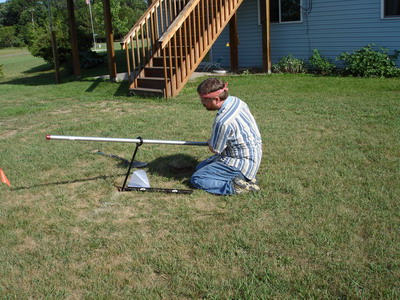
Screwing in one of the three Anchors
On the
evenings of June 28th and 29th I screwed in the giant 4-foot earth anchors the
guy cables would be attached to.
I slipped a 5-foot piece of pipe through the
eye of the anchors to use as a wrench to help me screw them into the ground. I
have sandy soil at my QTH, but this was a lot of work. I can't imagine how
difficult this would be in harder soil.
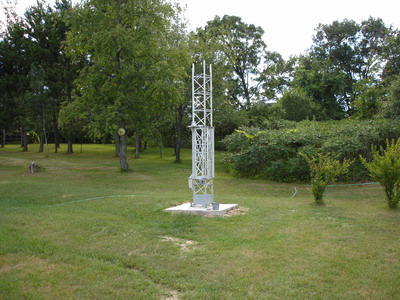
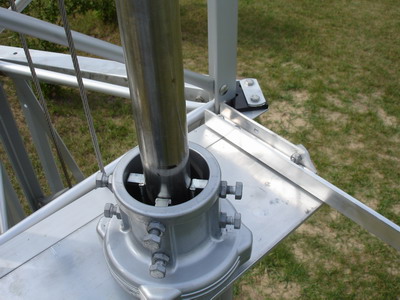
By this time the concrete had
cured enough to mount the hinged base and the bottom section of the tower onto
the base bolts. This allowed me to level the hinged base prior to raising the
tower, so I did not have to mess with it after the tower was up. This is where I
really knew that GME should have supplied me with three additional base bolt
nuts. I needed them to level and bolt down the hinge plate. The other thing I
thought they should have supplied me with but did not, were three galvanized
lock washers for the hinge plate. I bought these from my friendly neighborhood
Fastenal store.
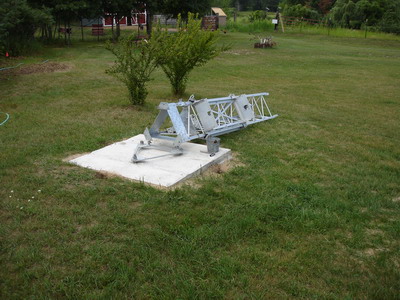
Bottom section tilted over.
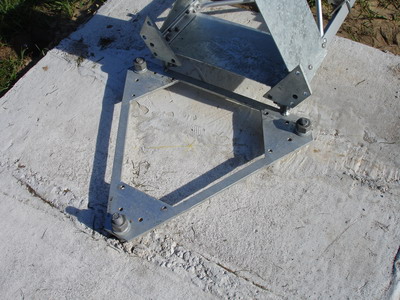
Base Plate
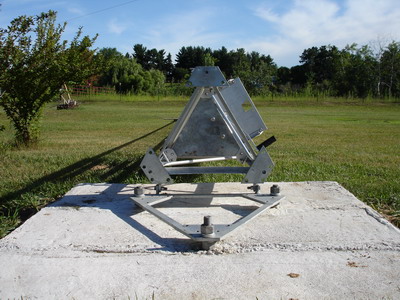
Anchor Bolts and Hinged Base Plate
Now it was time to start bolting the tower sections together. I found that I had to file the rough edges off of the adjoining sections so that I could get each section to slide together prior to inserting the bolts. But I will say this - the sections are engineered to fit together snugly without any slop at all. And the holes for the carriage bolts lined up nicely. Three cross braces are provided to bolt in place where each section connects to the next. This provides the continued stability and strength between sections.
Then I learned another lesson. I should have counted out the bolts and nuts. Disappointingly, here is where I found that GME had shorted me 12 bolts. It was only a couple of days away from the raising party, and here I was without all the bolts I needed to finish assembly! I called my sales guy at GME to ask him to send me the bolts overnight so that I would have them Friday morning, July 13th. I had taken the day off of work to prepare everything for the next day when my help would arrive. Amazingly, he could not promise me that I would receive my bolts next day delivery! So, again my neighborhood Fastenal store came to the rescue to provide me with the 12 each 1/4-20 stainless steel carriage bolts and the Nylok nuts that I needed. Thank heavens they had them in stock!